REVIEW · SAO MIGUEL ISLAND
Sete Cidades: E-Bike Rental with GPS and Map Tour
Book on GetYourGuide →Operated by Fun Activities Azores Adventure · Bookable on GetYourGuide
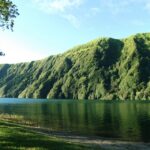
Sete Cidades feels made for e-bikes. With GPS guidance plus a route map, you can follow the rim of the volcanic caldera at your own pace and still hit the big viewpoints without getting turned around. It’s a practical way to cover ground around Lagoa Azul and Lagoa Verde while keeping your energy for the stops.
What I like most is the mix of variety and freedom: you choose among several itineraries with different vibes, and you get photo-stop time built into the flow. I also like the hands-on setup—helmets and gloves are included, and the bike experience tends to be smooth and comfortable (including gel or cushioned saddle options mentioned in feedback).
One thing to plan for: parts of the routes can be steep, and some segments are more “trail” than “bike path,” so you should be ready for rougher surfaces and the occasional push. On top of that, GPS can sometimes lose signal in bad weather, so having a paper or phone backup map helps.
In This Review
- Key Highlights You’ll Care About
- Sete Cidades on a GPS E-Bike: What You’re Really Getting
- Price and Value: Is $40 Worth It?
- Meeting Point, Start Time, and the Pace You Can Expect
- How the GPS Map Tour Works (and How It Can Go Wrong)
- Picking the Right Route: Itinerary 1, 2, 3, or 4
- Itinerary 1: Lagoa Azul Shores, Tunnel, and Quiet Lake Edges
- Itinerary 2: Bridge-to-Viewpoints plus the Cumeeira Pequena Adventure
- Itinerary 3: Cumeeira Grande, Pico da Cruz, Aqueduct, and Hydrangeas
- Itinerary 4: Warm-Up Bridge Crossing, Highest Point at 845 m, and Grota do Inferno
- Stop-by-Stop: From Sete Cidades Town to Grota do Inferno
- Sete Cidades (Start Area and First Feel)
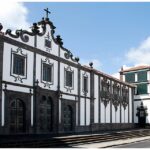
- Church of São Nicolau: Your Anchor Point
- Cerrado das Freiras: Trees, Viewpoints, and a Different Side of the Lakes
- Pico da Cruz: The Highest-Point Payoff
- Muro das Nove Janelas (Nove Janelas Aqueduct): The Landmark That Resets Your Eyes
- Lagoa do Canário: Another Lake Stop Worth the Minutes
- Grota do Inferno Viewpoint: Dramatic, So Plan Your Breathing
- Vista do Rei Lookout: Both Lakes and the Monte Palace Ruins
- Lomba do Vasco Viewpoint: Mosteiros Islets on the Horizon
- Back to Town
- Real Talk on Difficulty: Steep Parts, Rough Tracks, and Battery Confidence
- Weather, Crowds, and Respecting the Protected Areas
- What to Bring (and What They Provide)
- Should You Book This GPS E-Bike Tour?
- FAQ
- Where is the meeting point for the Sete Cidades e-bike tour?
- What time does the activity begin?
- Is pick-up or drop-off transfer included?
- How long is the tour?
- Are GPS and a map included?
- What safety gear is included?
- What routes are available?
- Do I need experience cycling?
- What is the minimum height to use the electric bike?
- What should I bring with me?
- Who is this tour not suitable for?
Key Highlights You’ll Care About
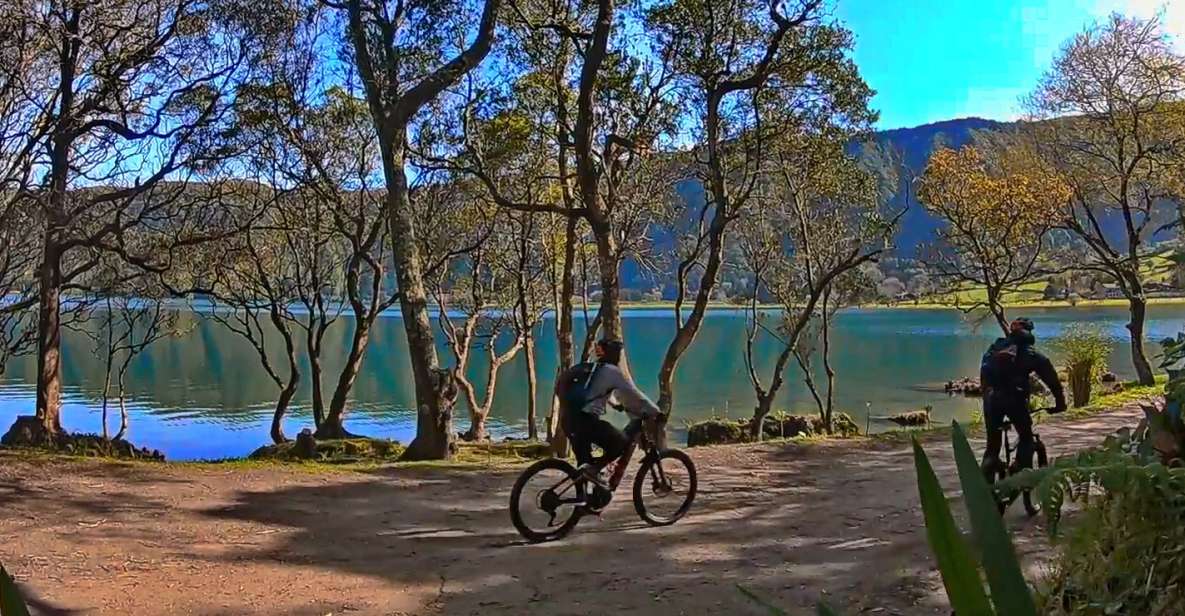
- GPS + recorded path with a matching map, so you can self-navigate without guessing
- Four itineraries built for different fitness levels and curiosity types
- Big viewpoint hits like Vista do Rei, Grota do Inferno, and Lomba do Vasco
- Classic Sete Cidades landmarks such as Nove Janelas Aqueduct and Church of São Nicolau
- E-bike assist that makes climbs doable, even if you’re not a mountain-bike person
- Weather and trail reality: mud, mist, steep edges, and sometimes busy foot traffic near the caldera
Sete Cidades on a GPS E-Bike: What You’re Really Getting
A Sete Cidades e-bike tour sounds simple until you see the scale. The caldera area spreads out across roads, rural lanes, and designated paths, with lookouts popping up in places that would be painful to reach on foot. The smart part here is the pairing of an e-bike with GPS navigation and an interpretive map, which turns a “wonderful view” into an actual route you can finish.
You’re not being pushed through a rigid checklist. You’re guided into the system—then you pedal, stop, and decide. That’s a big deal in Sete Cidades, because weather can change fast, clouds can roll in, and you’ll want flexibility to linger when the sky clears.
Also, this isn’t just scenic cruising. The routes connect lake edges, caldera viewpoints, and town landmarks—so you get variety in a single outing rather than spending half the day on transfers or repeated backtracking.
You can also read our reviews of more tours and experiences in Sao Miguel Island.

Price and Value: Is $40 Worth It?
At about $40 per person, you’re paying for more than the bike. Your package includes the e-bike experience with safety gear (helmets, gloves, reflective vest), route navigation tools (GPS + map), and practical support (first aid kit, basic repair kit, emergency contacts, and personal accident insurance). You also get a bicycle lock cable—small detail, but useful if you want to step off and explore around town.
Most of what you’d normally pay extra for on your own—battery-assisted wheels, navigation help, and safety basics—is bundled. Add in the fact you can do it over 2.5 to 6 hours depending on the itinerary and your pace, and the per-hour value can feel solid.
The tradeoff is that it’s not a fully escorted guided day for every minute. It’s structured self-guidance. If you’re the type who gets nervous without a guide riding nearby, you’ll want to treat the GPS instructions seriously and bring a backup plan if the signal gets flaky.
Meeting Point, Start Time, and the Pace You Can Expect
This ride starts at 9:30 a.m. with no transfer service, so plan to make your way to the meeting location on your own. The guidance is to consider the meeting point on the left side of the soccer field. The tour ends back at the same meeting point.
The estimated time is the maximum you’ll use the bike. Translation: you might finish sooner if your group is quick, your stops are short, and your trail conditions are friendly. You’re not locked into a rigid schedule minute-by-minute, but you should still assume that lookouts and photos will add time.
One more practical point: you need to be in good physical condition and know how to ride a bicycle. E-bike assist helps, but it doesn’t erase gravity.
How the GPS Map Tour Works (and How It Can Go Wrong)
The core of this experience is GPS navigation with a recorded path, plus a map that explains the route. The point is simple: you follow the route and stop where you want, without needing to interpret complicated directions yourself.
In real use, many people find the navigation easy to follow—some mention the GPS being intuitive. You’ll also typically get a briefing on how to use the kit, and staff can help if something gets confusing. Names that came up include Diogo, who was described as prompt and excellent with the briefing, and Henrique Sejas, who helped people appreciate the landscape during the ride.
Still, you should be realistic. If the weather is wet or visibility is low, GPS may briefly drop out. One rider had GPS go out and was glad to have their own backup map (paper and phone). So my advice: keep your backup ready, even if you’re planning to rely on the provided GPS.
Picking the Right Route: Itinerary 1, 2, 3, or 4
You’ll choose from multiple itineraries with different emphasis—some are more lakeside and town-focused, while others push harder toward higher viewpoints.

Itinerary 1: Lagoa Azul Shores, Tunnel, and Quiet Lake Edges
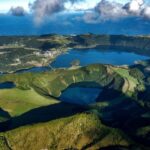
This one starts along the shores of Lagoa Azul and heads toward the Sete Cidades Tunnel, then returns to the parish area. You visit the Church of São Nicolau, cycle through traditional rural houses, and cross the bridge that divides the lakes—Lagoa Verde and Lagoa Azul.
A standout on this route is the connection through scenic lake edges, including showy cryptomeria trees near the Lagoa Verde shoreline and stops linked to the Bay of Silence. If you like slower, lakeside scenery with a chance to pause often, this is a good pick.
Itinerary 2: Bridge-to-Viewpoints plus the Cumeeira Pequena Adventure
Itinerary 2 crosses the bridge between Lagoa Azul and Lagoa Verde, then heads back toward Cumeeira Pequena, passing Lagoa do Santiago and Cerrado das Freiras.
You descend toward Vista do Rei, which gives panoramic views of both lakes and the abandoned Monte Palace hotel. Then you move onto a more adventure-style trail along Cumeeira Pequena, with stops connected to endemic species. The ride ends with Lomba do Vasco viewpoint, where you can see the islets of Mosteiros and the parish below, followed by a descent into town toward the Church of São Nicolau.
If you want viewpoints plus a bit of trail flavor, this is the route for you.
Itinerary 3: Cumeeira Grande, Pico da Cruz, Aqueduct, and Hydrangeas
This route starts cycling toward Cumeeira Grande for coast and caldera views. You pass the Cumeeira viewpoint and reach the highest point mentioned on this itinerary, Pico da Cruz.
Then you pass the Nove Janelas Aqueduct and have opportunities to visit Lagoa do Canário and the Miradouro da Grota do Inferno viewpoint. There’s also a stop tied to hydrangeas along the Regional Road, with different colors depending on season. Finally you pedal along the shores of Lagoa Azul.
If you want the classic “sequence of big views,” this tends to hit a lot of signature stops.
Itinerary 4: Warm-Up Bridge Crossing, Highest Point at 845 m, and Grota do Inferno
Itinerary 4 begins with a relaxed warm-up crossing the bridge between Lagoa Azul and Lagoa Verde, then heads toward Cumeeira Grande and passes through the parish of Sete Cidades.
You get amazed by views over sea, lakes, and pastures, plus a stop at the highest point of the volcanic complex listed here at 845 m. Then you cycle past the Nove Janelas Aqueduct again, with stops at Lagoa do Canário and Miradouro da Grota do Inferno (described as the most emblematic viewpoint on São Miguel).
From there you descend to Vista do Rei for both lakes and the Monte Palace hotel ruins, then follow a more adventure trail along Cumeeira Pequena to Lomba do Vasco, ending with the descent into Sete Cidades and the Church of São Nicolau.
This is often the “fuller” route if you want both lake edges and the higher caldera viewpoints.
Stop-by-Stop: From Sete Cidades Town to Grota do Inferno
Here’s how the signature stops fit together, and what each one is good for.
Sete Cidades (Start Area and First Feel)
At the start, you’ll begin in the Sete Cidades area with a bit of time that works for a quick self-paced town look or orientation. It’s a good moment to get calm, check your assist levels, and confirm your navigation screen is behaving.
A practical tip: if you’re not used to e-bikes, this is where you should experiment lightly with pedal assist before heading into climbs.
Church of São Nicolau: Your Anchor Point
The Church of São Nicolau shows up as a key stop on multiple itineraries. You’ll get break time for photos and time to visit. Even if you’re not a church person, it works well as a landmark that keeps your day feeling structured. You’ll also pass near this area at the end of the routes, which helps with the “return to town” feeling.
Cerrado das Freiras: Trees, Viewpoints, and a Different Side of the Lakes
Cerrado das Freiras is another recurring stop with photo time. On some routes, it’s linked to the “quiet” feeling of the lakes and the peninsula area. On others, it’s part of the way you connect to viewpoints as you move between lake edges and higher ground.
If you like small scenic breaks that don’t feel like a big “lookout platform,” this is one to enjoy slowly.
Pico da Cruz: The Highest-Point Payoff
Pico da Cruz is tied to the Cumeeira Grande climb on one itinerary and is described as a highest point option. This is where your effort should feel like it’s paying off—big views over the caldera and out toward the coast.
This is also where e-bike assist helps you keep your energy for photo time afterward, instead of arriving totally cooked.
Muro das Nove Janelas (Nove Janelas Aqueduct): The Landmark That Resets Your Eyes
You’ll see the Muro das Nove Janelas, also tied to the Nove Janelas Aqueduct. It’s a strong visual moment in the middle of the ride—one of those “pause and reframe” stops that breaks up the lake-and-hill rhythm.
If you’re the type who loves structure and engineering details, this will give your eyes something different than just water and sky.
Lagoa do Canário: Another Lake Stop Worth the Minutes
Canary Lake (Lagoa do Canário) appears as a stop option on routes that go toward the higher side. Expect a view pause rather than a long activity. It’s perfect for a short regroup, water sip, and quick photos.
Grota do Inferno Viewpoint: Dramatic, So Plan Your Breathing
The Grota do Inferno Viewpoint is mentioned as Miradouro da Grota do Inferno, described as the most emblematic viewpoint on São Miguel in one itinerary. This is the kind of place where the view can make you forget you just climbed.
If you’re nervous around steep edges, take it slow here. You’ll want a stable stance for photos.
Vista do Rei Lookout: Both Lakes and the Monte Palace Ruins
At Vista do Rei, you look out over both Lagoa Azul and Lagoa Verde, plus the abandoned Monte Palace hotel. It’s a visually interesting contrast: natural power up close, and a human story that didn’t work out.
If the clouds are low, this stop can swing from amazing to atmospheric. Either way, it’s worth the time.
Lomba do Vasco Viewpoint: Mosteiros Islets on the Horizon
Lomba do Vasco viewpoint adds a different feel. It’s tied to seeing the islets of Mosteiros and the parish. This gives your day a broader geography, not just a single caldera bowl.
Back to Town
Most routes end with a descent into the heart of Sete Cidades, leading you toward the Church of São Nicolau again. That loop closure matters. It makes the ride feel like a complete experience rather than a half-day out-and-back.
Real Talk on Difficulty: Steep Parts, Rough Tracks, and Battery Confidence
E-bikes make this doable, but the terrain still has opinions. Some routes include steep uphill and downhill sections. Reviews also mention that some cyclists found a moderate route steeper or busier than expected, and that a few trail segments can be torn up enough that you may need to get off and push.
Here’s what to take from that:
- You don’t need mountain-bike skills, but you do need comfort with uneven ground.
- If steep descents make you tense, choose the route that matches your confidence level.
- Treat the day as a mix of riding and short pushes, not a smooth paved ride the whole time.
And remember the guide note: the estimated time is the maximum bike time. So if you’re feeling good, you can keep an easy tempo and still finish without rushing.
Weather, Crowds, and Respecting the Protected Areas
This is an outdoor ride in a place that can get misty and damp. One rider described having low cloud and damp conditions but still finding it peaceful, safe, and scenic. They also called out that mud can happen, so plan for shoes that can handle wet trails.
Crowds can be a factor around the caldera area. The route can pass through tracks that are shared with walkers, and there may be other tours operating nearby. That’s not a dealbreaker—it just means you might want to keep moving and treat the lookouts as photo moments rather than long hangs if the space is tight.
Finally, the route travels through public roads, hiking trails, agricultural pathways, and protected landscapes. That means you should ride responsibly, respect foot traffic, and leave no trace.
What to Bring (and What They Provide)
They supply a lot of the basics:
- Cycling helmets and gloves
- GPS with recorded path and a map with route descriptions
- First aid kit and emergency contacts
- Basic repair kit
- Personal accident insurance
- Bicycle lock cable
- Reflective vest
What you should bring:
- Passport or ID card
- Comfortable shoes
- Sunglasses
- Sunscreen
- Comfortable clothes
- Daypack
- Reusable water bottle
- Windbreaker
If you’re going to spend time at viewpoints, sunscreen matters more than you think—even when it’s not blazing hot.
Should You Book This GPS E-Bike Tour?
Book it if you want a high-view day with minimal navigation stress. The combination of GPS + map means you can spend your energy enjoying Lagoa Azul and Lagoa Verde instead of studying directions. It’s also a great choice if you want options: routes that stay calmer or routes that push toward higher viewpoints like Pico da Cruz and the 845 m stop.
Skip (or switch to a gentler plan) if steep terrain and rougher tracks make you uncomfortable. Also, this isn’t for everyone: it’s not suitable for pregnant women, people with mobility impairments, and anyone shorter than 1.50 m.
If you do book, bring a backup map just in case GPS gets weird in wet weather, and give yourself permission to move slowly at the viewpoints. That’s where the day gets good.
FAQ
Where is the meeting point for the Sete Cidades e-bike tour?
The tour starts at the meeting point on the left side of the soccer field, with guidance to consider that location. It ends back at the same meeting point.
What time does the activity begin?
The activity starts at 9:30 a.m. (you should consider the meeting time as well, since the ride begins at the activity start time).
Is pick-up or drop-off transfer included?
No. The transfer service (pick-up and drop-off) is not available.
How long is the tour?
The duration is listed as 2.5 to 6 hours. You’ll need to check availability to see starting times.
Are GPS and a map included?
Yes. The experience includes a GPS with the respective recorded path and a map with descriptions and explanations of the route.
What safety gear is included?
Helmets and gloves are included, along with a first aid kit and emergency contacts, a basic repair kit, and a reflective vest. You also get bicycle lock cable and personal accident insurance.
What routes are available?
There are four different itineraries available, each with its own route and set of viewpoints and stops.
Do I need experience cycling?
You need to be in good physical condition and know how to ride a bicycle. Having some cycling experience can help, but it isn’t required in the general guidance provided.
What is the minimum height to use the electric bike?
You must be at least 1.50 meters (4 feet 11 inches) tall to use the electric bicycle.
What should I bring with me?
Bring an ID or passport, comfortable shoes, sunglasses, sunscreen, comfortable clothes, a daypack, a reusable water bottle, and a windbreaker.
Who is this tour not suitable for?
It is not suitable for pregnant women, people with mobility impairments, and people under 150 cm in height.