REVIEW · MALTA
Workshop: Maltese Souvenir Tile Design Experience
Book on Viator →Bookable on Viator
A Maltese tile class beats another museum stop. In Clive’s small art studio in Marsa, you learn how the island’s famous tiles are designed and made, then paint your own 10 x 10 cm souvenir. I love the mix of culture and hands-on making, not just watching. One thing to consider: the finished tile is air-dry (not oven-baked), so treat it gently once you’ve left.
You’ll start with a short talk on Maltese tiles—what makes them Maltese, how patterns connect to the island’s look and taste, and what to aim for in your own design. Then the practical work takes over: concept, pattern, mold-making, transferring the design, and painting with quick-dry acrylics. I also like how the class keeps you moving step-by-step, so beginners still feel in control. A possible drawback is that a “get everything perfect” vibe can be tricky if you’re in a rush, since the work is a real process, not a quick craft.
This is a smart indoor option when Malta’s sun is doing its job. Expect about 2 hours, English instruction, and a private setup for your group. If you’re booking close to your trip, confirmation may take a bit, depending on availability—but the experience is designed so most people can participate.
In This Review
- Key things you’ll notice right away
- Maltese tile design: why this souvenir actually matters
- Entering Clive’s Marsa studio: traditional house, calm focus
- The 2-hour flow: from tile history to your painted coaster
- 1) Quick Maltese tile background before you start making
- 2) Your design plan: choose a pattern or make one yours
- 3) Mold-making: plaster (and the cement-base approach)
- 4) Transfer and paint: acrylics that dry fast
- 5) Take-home time: your handmade tile keepsake
- What you’ll actually be making: the coaster size and materials
- The tile size (so you can plan for space)
- The material reality: air-dry, not oven-baked
- Quick-dry acrylics for a finish you can do in one session
- Patterns, help, and the real value of a teacher in the room
- Price and value: what $35.95 buys you in Malta
- Practical tips that make the workshop easier
- Wear comfort over fashion
- Plan for travel with a fragile souvenir
- Use the photos included
- Booking timing: it’s popular enough
- Who this workshop is best for (and who it’s not)
- Small logistics to get right so you enjoy it
- Should you book the Maltese souvenir tile workshop?
- FAQ
- How long is the Maltese souvenir tile design experience?
- Where is the workshop located in Malta?
- Is the workshop offered in English?
- What will I make and what size is it?
- Is the tile baked in an oven?
- Can beginners participate?
- Are photos included?
- Can I make an extra tile?
- Is this a private activity or shared with others?
- Are service animals allowed?
Key things you’ll notice right away
- A real Marsa studio in a traditional house makes the experience feel personal, not like a factory tour
- A custom 10 x 10 cm tile you can use as a coaster souvenir
- Plaster/white-cement mold and air-dry finish (no oven baking)
- A step-by-step method from early design research to final acrylic painting
- Photos are included, and you can add a second tile if time allows
Maltese tile design: why this souvenir actually matters
Maltese tiles aren’t just decoration. They’re one of those details that quietly shapes how a town feels—on doorways, in corridors, along walls where you notice them again and again. In this workshop, you don’t just learn the story in theory. You translate the look into your own hands, which is why it makes such a satisfying memory.
And yes, it’s still a souvenir. But it’s a different type than the usual magnets and postcards. A tile is tactile and specific to Malta’s visual language. The class ends with you taking home a handmade piece you can actually use—this one is sized at 10 x 10 cm, so it works as a coaster for your morning coffee (or as a display tile if you’d rather keep it pristine).
You can also read our reviews of more tours and experiences in Malta.



Entering Clive’s Marsa studio: traditional house, calm focus
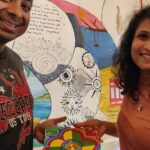
The workshop happens in a small art studio located in Marsa, inside a traditional house. This matters more than you might think. It keeps the session low-key and grounded. You’re not fighting noise, crowds, or the pressure to “race through” something before your next stop.
You’ll meet at 23 Gizwiti, Il-Marsa (MRS 1562), Malta, and the activity finishes back at the same meeting point. Since it’s near public transportation, you don’t need a private transfer just to get here—handy if you’re also bouncing between other spots in the area.
It’s also private for your group. That’s a big plus for couples, families, and anyone who doesn’t want a loud shared workshop vibe. With English offered, you can follow the explanation and get hands-on help without feeling lost.
The 2-hour flow: from tile history to your painted coaster
The workshop is about two hours. The pace is practical: you get a short historical overview, then you shift into making. Here’s the sequence in plain terms, and what each part is really good for.
1) Quick Maltese tile background before you start making
You begin with a brief historical information session on Maltese tiles. The point isn’t to overwhelm you with dates. It’s to give you a visual and cultural target for your design. When you understand what the patterns are trying to do—symmetry, motifs, ornamental style—you make better choices with paint.
2) Your design plan: choose a pattern or make one yours
Next, you’ll create your own replica tile design. You can either design your own pattern or use patterns available in the studio. That flexibility is smart if you’re a beginner: you can still be creative without having to invent everything from scratch.
This part is also where you can slow down and pick a style that fits your taste. If you like bold, busy ornament, you’ll likely enjoy certain traditional patterns. If you prefer something cleaner, you can choose a motif that keeps the details readable once painted on a small tile.





3) Mold-making: plaster (and the cement-base approach)
You’ll learn how the mold is made using plaster, and how the design gets transferred to it. Even if you’ve never worked with molds, the workshop is structured so you’re guided through the steps, not left to figure it out alone.
You’ll also be working with a base made using plaster or white cement, and the final tile is not baked in an oven. It’s air-dried. That’s important context for handling and expectations (more on that below).
4) Transfer and paint: acrylics that dry fast
After the mold step, you transfer the design and then paint it using acrylics, described as a quick-dry medium. This is a good choice for a short workshop because it lets you keep moving through the process without waiting around for paint to set.
Acrylics are also forgiving in a way that suits visitors with different skill levels. If you need to adjust a line or add a bit of color, quick-dry paint makes that easier. And because you’ll be painting a small surface (10 x 10 cm), your brushwork has a clear effect fast.
5) Take-home time: your handmade tile keepsake
By the end, you keep the tile. It’s meant to be a souvenir you can use, not something you only watch as it’s explained. People also talk about receiving it in a nice box, which helps if you’re traveling with it.
What you’ll actually be making: the coaster size and materials
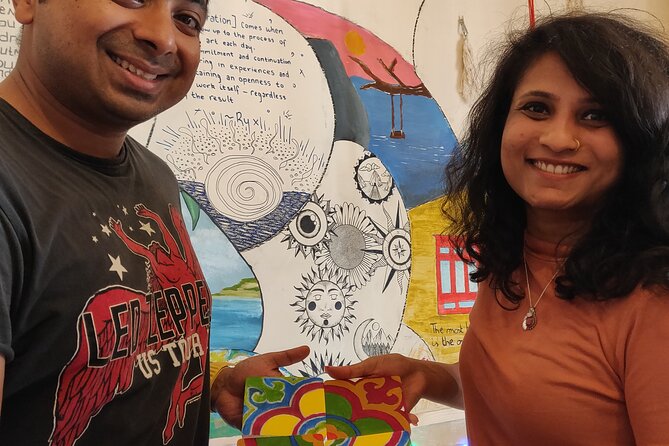
This is where you get the real-world details that affect what you pack and how you treat the tile later.
The tile size (so you can plan for space)
Your finished piece is 10 x 10 cm. That size is practical: it’s big enough to show off a pattern, but small enough to fit into luggage without taking over your entire bag.
The material reality: air-dry, not oven-baked
One key note: the tiles are not baked in an oven. They are air-dry and made with cement as part of the process. This affects expectations after you leave.
If you’re the kind of traveler who tosses things into a bag without a second thought, slow down here. Give your tile packing priority. Use whatever packing the workshop provides, and keep it flat so you don’t chip an edge.
Quick-dry acrylics for a finish you can do in one session
Since painting happens during the workshop with quick-dry acrylics, you’re not stuck waiting for layers for hours. That’s one of the reasons this fits comfortably into a 2-hour slot.
Patterns, help, and the real value of a teacher in the room
A big reason this class gets such strong feedback is the combination of structure and personal help. The host, Clive, is both friendly and hands-on as you move from concept to finished painting.
What that means for you:
- You’ll get help choosing or placing a traditional pattern on your tile.
- You’ll learn the method step-by-step rather than being handed a “starter kit” and told to go.
- If you’re unsure about your painting or design, you’re not just watching instructions on a sign. You have someone there to steer you.
It also helps that the studio setting feels quirky and artsy in a good way—like a workshop that’s alive, not just staged for tourists. Conversations can naturally drift into Maltese art and culture, and you can ask questions along the way.
Price and value: what $35.95 buys you in Malta
At $35.95 per person, you might compare it to museum tickets or a guided city walk. This is different value.
You’re paying for:
- A guided, step-by-step art session
- A finished, handmade tile souvenir you keep
- Photos included in the price
- English instruction
- A private group experience (so you’re not sharing attention with a crowd)
For me, the “value logic” here is simple: you’re buying an experience you can take home as an object. You also get an indoor cultural activity that’s not just about sitting in a chair. Even if you’re not an artist, you’ll leave with something tangible that feels tied to Malta rather than generic.
There is an optional extra: it’s possible to make an extra tile if you have time. That extra tile costs 3 euro. If you’re traveling with someone and you both want your own coaster, it’s a low-cost way to make the day feel more personal.
Practical tips that make the workshop easier
Wear comfort over fashion
Dress comfortable. You’ll be doing hands-on making and painting, and you’ll want to move your arms freely while you work.
Plan for travel with a fragile souvenir
Because the tile is air-dry and not oven-baked, packing matters. Keep it protected and let it be “the main character” in your bag. This is especially true if you’re taking it on buses or walking long distances after the class.
Use the photos included
Since photos are included, treat that as part of the experience. Take a moment before you start painting for a quick record. Then, when you’re finishing up, capture the painted tile too. It’s a great way to document your process for later.
Booking timing: it’s popular enough
On average, this gets booked about 20 days in advance. If your dates are fixed, booking earlier is the safer play. If you’re spontaneous, you might still find availability, but it’s smart to check soon.
Who this workshop is best for (and who it’s not)
This is ideal for:
- Couples looking for an indoor, low-stress cultural activity with a take-home result
- Families with kids or teens who like hands-on crafts, not just sightseeing
- Beginners who want guidance and help selecting designs
- People who want a break from the sun while still doing something distinctly Maltese
It’s less ideal if:
- You want a high-energy, fast-paced tour with lots of walking and stops
- You hate anything that requires careful handling of an item after creation
- You want a fully baked, ceramic-style tile (this is air-dry cement with paint)
Small logistics to get right so you enjoy it
The class runs for about 2 hours and ends where it begins. It’s in Marsa at 23 Gizwiti. Language is English. It’s offered as a private activity for your group, not mixed with strangers.
Mobile ticket comes to your phone. Service animals are allowed. Most people can participate, and since it’s hands-on art rather than a fitness activity, you don’t need special skills—just willingness to try.
Also, note that the experience requires good weather for operation. It may sound odd for an indoor activity, but it’s part of how the provider plans. If your Malta day is at the mercy of heavy rain or disruption, check your plans closer to the time.
Should you book the Maltese souvenir tile workshop?
If you want a Malta memory that you can touch every day, this is a strong yes. You get a real cultural craft, guided instruction from Clive, and a finished 10 x 10 cm tile coaster you take home. It’s also a nice change from standard museum hours, with a calmer pace and a creative payoff.
Book it if:
- You like making things with your hands
- You want an indoor activity that still feels local
- You’re traveling with someone who’d enjoy a creative challenge, even a beginner-friendly one
Skip it only if:
- You can’t handle carrying and protecting an air-dry cement tile afterward
- You want a sightseeing-heavy itinerary rather than a workshop
FAQ
How long is the Maltese souvenir tile design experience?
It lasts about 2 hours.
Where is the workshop located in Malta?
It takes place in Marsa, at 23 Gizwiti, Il-Marsa MRS 1562, Malta.
Is the workshop offered in English?
Yes. English is offered.
What will I make and what size is it?
You’ll create and take home a replica Maltese tile, sized at 10 x 10 cm, which can be used as a coaster.
Is the tile baked in an oven?
No. The tiles are air dry and made with cement, not oven-baked.
Can beginners participate?
Yes. The activity is ideal for both beginners and advanced.
Are photos included?
Yes, photos are included in the price.
Can I make an extra tile?
Yes, if there’s time. An extra tile costs 3 euro.
Is this a private activity or shared with others?
It’s private. Only your group participates.
Are service animals allowed?
Yes, service animals are allowed.
If you tell me your travel dates and who you’re going with (couple, family ages, solo), I can help you decide whether this fits best with your other Malta plans.